Homebrewing your own beer can be a fun and rewarding hobby. Many homebrewers get started because they want to save money on beer. But is it actually cheaper to brew your own beer versus buying it? Here is a breakdown of the costs, pros and cons, and steps for making your own beer at home.
Who is Homebrewing For?
Homebrewing is great for beer lovers who want to:
- Save money on beer purchases
- Experiment with unique beer recipes and ingredients
- Have full control over the brewing process
- Make beer styles that may not be available commercially
- Enjoy a fun DIY hobby
Homebrewing does require an initial investment in equipment and learning. It may not make sense for very casual beer drinkers or those on a tight budget.
What is Needed to Start Homebrewing?
To brew beer at home you will need:
Basic homebrewing equipment
- Large brew kettle (5+ gallon capacity)
- Fermenter (bucket or carboy)
- Airlock
- Bottles or keg system
- Sanitizing supplies
- Stir spoon, thermometer, strainer, tubing
Ingredients
- Malt extract, crushed grains, or all-grain ingredients
- Hops
- Yeast
Other supplies
- Bottle caps, crowns, or keg connectors
- Cleaners and sanitizers
- Brewing ingredients and recipe kit
When Did Homebrewing Become Popular?
Homebrewing first became popular in the United States in the 1970s and 80s. This coincided with the rise of small microbreweries. Homebrewing was legalized in 1979. Since then, the hobby has continued to grow thanks to increased interest in craft beer.

Homebrewing is also popular worldwide. It is a traditional practice in many European countries. Events like the National Homebrew Competition help advance brewing knowledge. The American Homebrewers Association has over 46,000 members as of 2019, showing the hobby is still gaining steam.
How to Start Homebrewing Beer
Homebrewing beer for the first time requires some basic brewing knowledge. Here is an overview of the typical process:
- Choose a beer recipe kit. Beginner kits contain pre-measured ingredients and instructions. This makes brewing easy for first-timers.
- Sanitize all equipment. Proper sanitation prevents beer spoilage from bacteria. Soak gear in sanitizing solution.
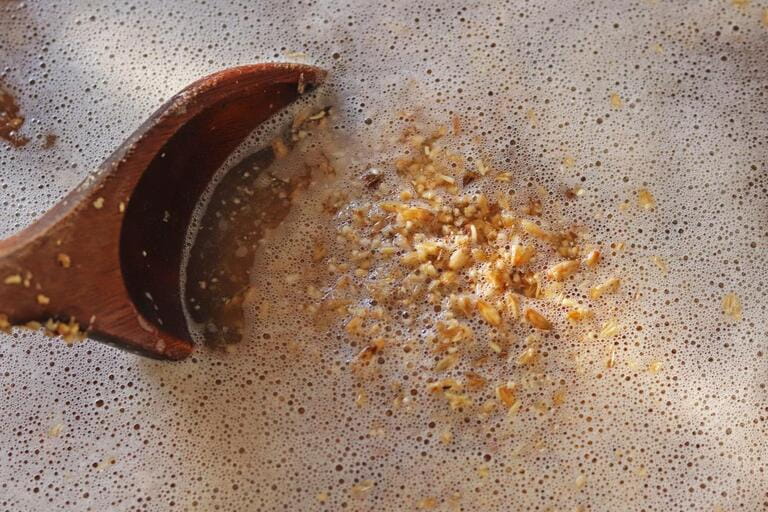
- Steep specialty grains. Place crushed grains into hot water to extract flavor and fermentable sugars.
- Boil malt extract and hops. Bring to a boil, then add malt extract and hops according to recipe timings. This develops hop flavors and aromas.
- Cool boiled wort. Cool quickly to around 70°F before adding yeast. This prevents off flavors.
- Pitch yeast. Add liquid or dry yeast once cooled. This ferments beer sugars into alcohol and carbonation.
- Ferment. Allow beer to ferment for 1-2 weeks until complete. Move to bottling once final gravity is reached.
- Bottle or keg. Transfer finished beer from the fermenter to bottles, kegs, or barrels for carbonating and aging.
Pros of Homebrewing Your Beer
Save money: Homebrewing can save you 50% or more per beer versus buying craft beer. Bulk discounts on ingredients help lower costs more.
Total control: Design recipes personalized for your taste. Adjust aspects like alcohol, bitterness, color, and more.
High quality: With attention to sanitation and fermentation, homebrew can taste as good or better than commercial beers.
Unique styles: Craft original, experimental, historical, or clone beer recipes not found in stores.
Fun hobby: Homebrewing is an engaging hobby for beer geeks. Learn more about ingredients, the brewing process, and beer judging.
Cons of Brewing Your Own Beer
Equipment costs: A proper homebrew setup requires an initial investment of $100-$500 on gear. This lowers potential savings.
Learning curve: Making quality beer requires learning processes like sanitation, fermentation control, and recipe design. Expect a few early batches to have flaws.
Time commitment: Beer brewing and bottling is a multi-hour process. Total time ranges from 4-8 hours per 5 gallon batch.
Consistency: Achieving consistent flavors and carbonation batch to batch can be tricky for beginners.
Volume: It's difficult to brew the volume of large commercial breweries. Storage space for aging batches may be limited.
Alternatives to Brewing Your Own

If homebrewing sounds interesting but you're unsure about starting, consider these alternatives:
- Brew-on-premises: Some shops will let you brew and bottle a batch with their equipment for a rental fee. This lets you try the process at a lower investment.
- Beer clubs: Join a club like the American Homebrewers Association to connect with other local homebrewers, share knowledge, and even brew collaboratively.
- Festivals/competitions: Attend beer festivals and homebrew competitions as a beer enthusiast to try lots of styles and learn more about the hobby.
- Introductory classes: Many homebrew shops offer classes for beginners to learn about ingredients, equipment, and the brewing process before purchasing gear.
Step-by-Step Guide to Your First Homebrew
Follow this detailed guide to brew your very first batch of delicious homemade beer:
1. Gather Equipment and Ingredients
You'll need basic homebrewing equipment like a brew kettle, fermenter, siphon, sanitizer, bottles, caps, and accessories. Shop at a homebrew store or online retailer.
Next, purchase a recipe kit for your first beer. Kits designed for beginners make the process easy. Consult with staff on a style you'll enjoy.
2. Sanitize Equipment
Thoroughly clean then soak all equipment touching the beer in sanitizing solution. This kills bacteria that can create off flavors or spoilage.
3. Steep Grains
Place any specialty crushed grains into water heated to 150-160°F. Steep for 20-30 minutes. This extracts flavor, color, and fermentable sugars from grains.
4. Start Boil
In the brew kettle, bring diluted malt extract to a rolling boil. This evaporates excess water and inhibits contamination. Watch closely to prevent boil overs.
5. Add Hops
Once boiling, add hops according to the recipe's schedule. Generally bittering hops are added early in the boil, while aroma hops go in at the end. Using timers helps with precision.
6. Cool Wort & Transfer
After the boil, cool the wort quickly to 70-80°F using a wort chiller or ice bath. Transfer the cooled wort into your sanitized fermenter.
7. Pitch Yeast
Once cooled, add liquid or dry yeast and aerate well. This starts fermentation which converts sugars into alcohol and carbonation.
8. Ferment the Beer
Allow the beer to ferment undisturbed for 1-3 weeks. Monitor gravity daily at end until final target is reached. Move to bottling or kegging once complete.
9. Package Beer
For bottling, transfer beer to a bottling bucket, add priming sugar, and fill sanitized bottles. Cap and store for 2 weeks at room temp. For kegs, transfer beer and carbonate.
10. Enjoy Your Homebrew!
After conditioning, chill bottles or tap a keg. Pour your first homemade beer. Cheers! Take notes on the flavor to improve recipes. With practice your beers will continue getting better.
Tips for Making Quality Homebrew

Follow these tips from experienced homebrewers to help make stellar beer right in your kitchen:
- Start with a recipe kit - Follow instructions precisely until you're comfortable designing your own recipes.
- Control fermentation temps - Keep beers at ideal yeast temperatures for clean fermentation flavors.
- Use fresh ingredients - Buy quality malt, hops and yeast. Store properly to maximize freshness.
- Record details - Keep brewing logs of ingredients, timings, temps, etc. Tweak variables to improve recipes.
- Practice patience - Allow proper time for fermentation, conditioning, carbonating, and aging. No shortcuts.
- Sanitize thoroughly - Obsess over sanitation to avoid bacteria that can ruin beer.
- Taste commercial beer - Try benchmark examples of styles you want to brew. Determine flavor targets.
- Join a homebrew club - Get mentored by experienced homebrewers who can evaluate your beers and provide feedback.
The Best Beer Styles for Beginner Homebrewing
When first starting out, select beer styles that are easier to brew at home. Some guidelines:
- Pale ales - A very versatile style. Maltier than IPAs. More forgiving to brew.
- Amber or brown ales - Malt-forward and minimally hoppy. Beginner friendly and tasty.
- Porters - Easy drinking with chocolate and roast flavors. Low hop bitterness.
- Hefeweizens - Pillowy with lovely baking spice and clove notes. Hide flaws well.
- Blond ales - Light, crisp, and refreshing. Simple grain bill. Accessible flavor.
- Irish red ale - Balance of roasty malt and toasty flavors. Low hop requirements.
- American wheat - Light citrusy flavors that complement fruity yeast esters.
Avoid challenging styles like heavily hopped IPAs, strong Belgian beers, or lagers. As skills improve, you can brew more advanced recipes successfully.

Compare Cost: Homebrew vs. Store-Bought Craft Beer
How much can you actually save by homebrewing versus buying beer? Here is an example cost breakdown of 5 gallons of American pale ale, a popular beginner style:
Homebrew 5 Gallon Cost
- Grain and extract: $20
- Hops: $10
- Yeast: $8
- Caps: $10
- Sanitizer, water, etc: $5
Total cost: $53
Per pint cost: $0.66 (based on 5 gallons = 40 pints)
Craft Beer Cost
- Local pale ale 6-pack: $12
- Additional 6-packs: $84 (to get equivalent of 40 pints)
Total cost: $96
Per pint cost: $2.40
In this example, homebrewing the same beer style saves 73% compared to buying craft beer. Actual savings depend on many factors like beer style, quality of ingredients, etc. But in general, homebrewing beer costs 50-75% less per pint.
FAQs About Homebrewing Your Own Beer
Is homebrewing difficult for beginners?
Homebrewing does have a learning curve but starter kits and patience make it very achievable for first-timers. Focus on sanitation, temperature control, and following instructions precisely. Joining a homebrew club also helps build knowledge quickly.
What are the total startup costs?
A basic homebrew setup with a kettle, fermenting system, accessories and ingredients will run $200-$500. Buying high quality equipment upfront saves money in the long run.
How much space do you need?
Homebrewing requires storage space for supplies and fermenting beer. A spare closet, basement corner, garage or large pantry area is ideal. Smaller kitchen brewing is possible but challenging.
Is homebrew safe to drink?
Homebrew made properly with good sanitation practices is completely safe to drink and share. Off flavors may occur if infections happen, but it won't make you sick.\n\n### How long does homebrew keep?
Similar to commercial beer, homebrew stored cool and dark will stay fresh for 3-6 months. High alcohol beers may age longer. Over time, hop flavors fade so drink IPAs quickly.
Conclusion
While homebrewing requires an investment in equipment and learning, it can ultimately provide huge savings over 50-75% per beer versus buying craft beer. With proper sanitation and fermentation control, homebrewers can craft excellent beer using their own recipes. Starting simple with pale ales, ambers, and other beginner styles makes success very achievable for first time homebrewers. Homebrewing is also a fun hobby that lets you fully control the brewing process.

